Appearance
Create and verify your company (no-code)
The no-code guide will take you through the following steps to successfully create and verify your company:
- Get to know your Dashboard – Learn how to log into the Dashboard and discover the interface.
- Create your company and its members – Create the legal entity, its legal representative and shareholders.
- Review KYC Documents – Make sure the proper documents have been uploaded in accordance with your KYC Form.
- Submit your company's KYB – Send the documents to Treezor for verification.
- Create your Master Wallet – Create the company's Wallet.
- Abide by additional vigilance measures – Make a SEPA Credit Transfer to your Wallet in production if indicated by your KYC Form.
Get to know your Dashboard
The no-code guide relies on Treezor's Dashboard, a user interface allowing you to interact with the Treezor API without relying on developer tools.
Log into your Dashboard
Treezor provided you with the URL to log into your Dashboard. For your Sandbox, the URL is built as follows:
https://dashboard-{yourCompanyName}.sandbox.treezor.co
Upon entering this URL, you'll be redirected to the sign-in page, which is different depending on whether you've opted for standard login with 2FA or Company SSO login.
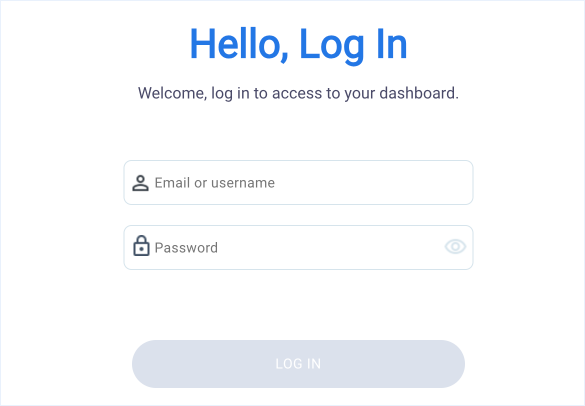
Below is an example of Treezor's default login page.
Discover the Dashboard interface
Before you start, let’s take a quick guided tour of the key components of the Dashboard interface.

Note – Your Dashboard is customizable
The views may differ from the screenshots displayed depending on:
- Where you’re at in your integration process, if you’re customizing the design
- The User Role of the logged-in user, if you’re not using all of Treezor's features
- Your localization and language selection
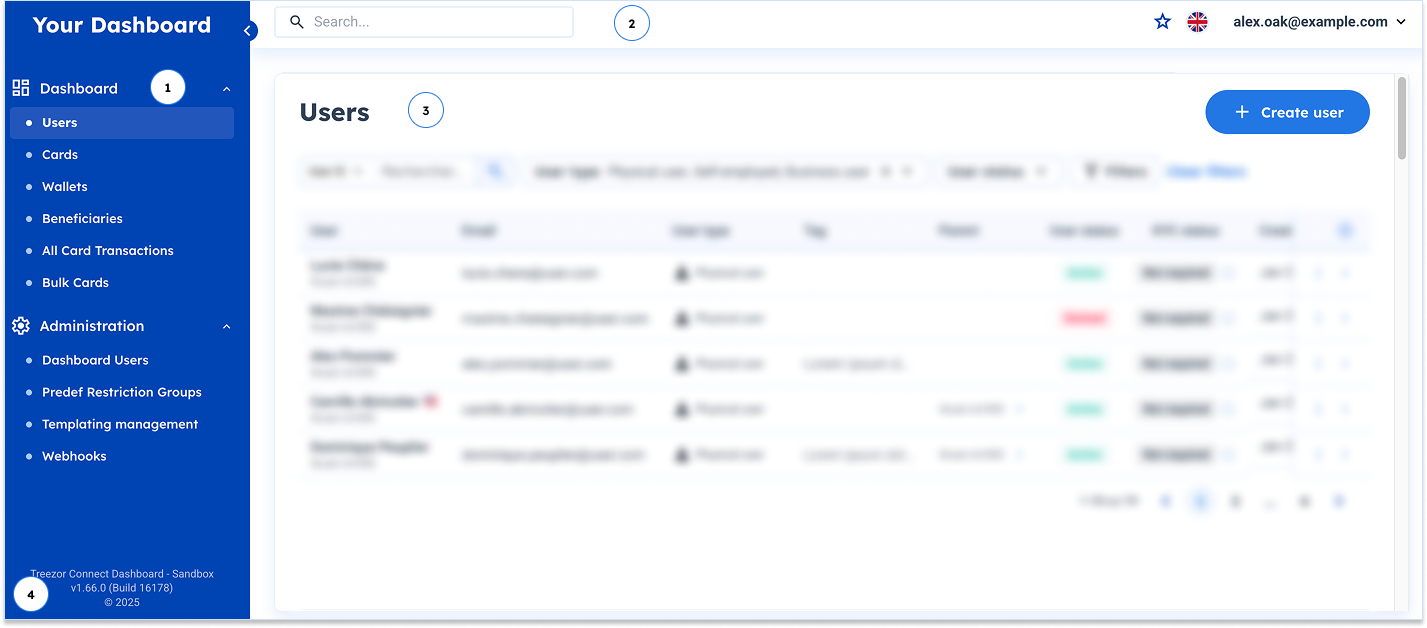
| # | Section | Description |
|---|---|---|
| Navigation menu | Located on the left-hand side, this foldable menu allows you to navigate to the different views:
| |
| Main toolbar | In the upper part of each view, the Main toolbar contains the search field, the list of favorites, the language selection, and the account drop-down, for you to log out or access your Account page. | |
| Main view | Main content, which depends on the selected view. By default, the Users view is displayed. | |
| Environment | In the bottom left corner, you’ll find information about your environment and the version of the Dashboard. |
Accessing your users
You may access your user information by:
- Taking advantage of the main Search field.
- Navigating the Users view.
Upon selecting a user, the corresponding details will be displayed in the User details view.
Search field
The Dashboard main toolbar provides a search field, whose searchable attribute becomes dynamically available depending on what you enter.
Here are the attributes for you to search users:
- User ID – The
userIdautomatically generated by Treezor when creating a user. - User Tag – The
userTag, a field you can populate to suit your needs. - Email – The
emailprovided during the user creation. - Name – Takes into account the
firstName,lastName,legalName, andemailprovided during the user creation.
After validating your search for a given user attribute, the Users view is displayed, filtered on the corresponding User for you to select.
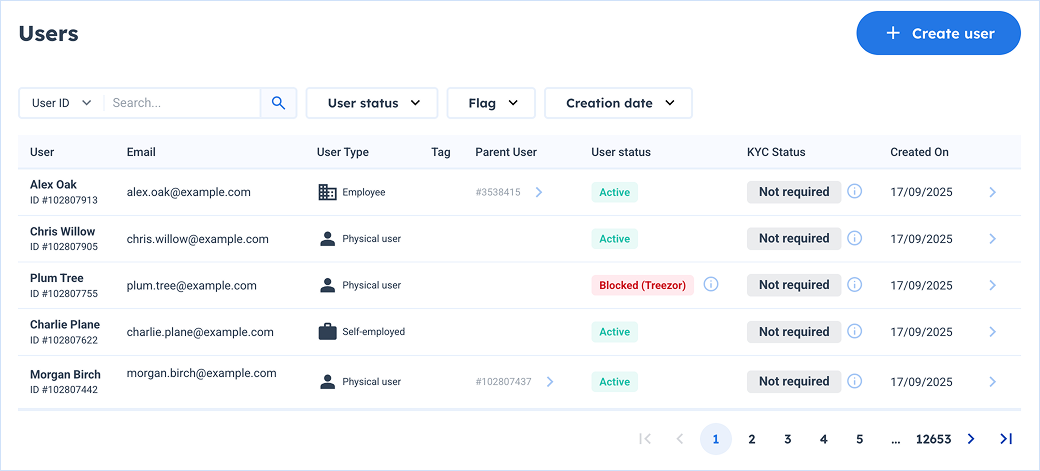
Users view
The Users view lists all your users with their key information. Clicking on arrow icon for a user switches the view to the corresponding profile in the User details view.
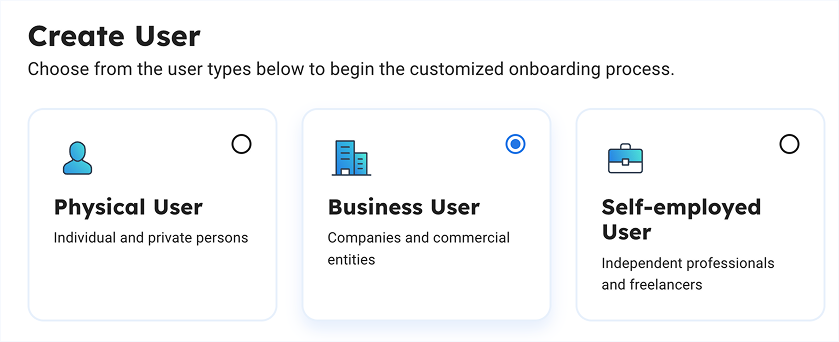
Select the Business User creation path
The Dashboard offers tailored user creation paths for you to do all the steps to create your company in one go. Your company is a legal entity, a user that is referred to as a Business User in the Dashboard.
→ Access the Create User view by clicking on the "Create User" button in the upper-right corner of the Users view.
→ Select the "Business User" creation path and click on the "Continue" button to start creating your company.
Fill the main information of your company
You can now provide the declarative data of your company, as requested by the KYC Form shared with you by Treezor.
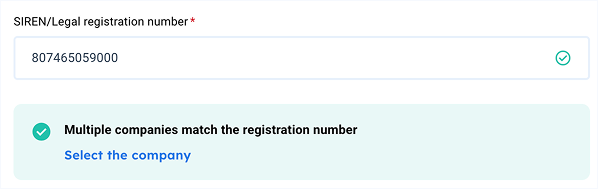
If your company is listed in Credit Safe, entering the legal registration number will allow you to automatically prefill information.
→ Enter your company registration number or SIREN.
After a short loading time, the following may occur:
The company is found
→ Click on the "Prefill data" button.
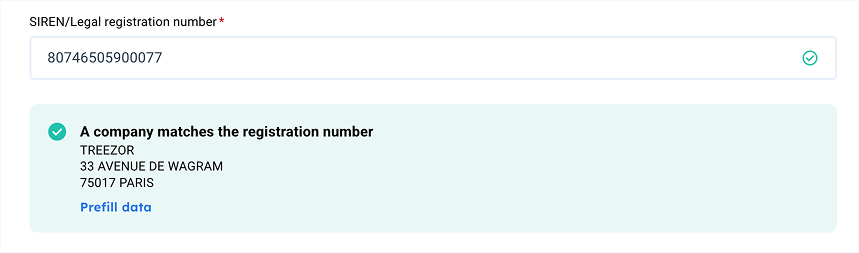
→ Thoroughly check and edit the prefilled information if need be.
Several companies are found
→ Click on the "Select the company" button.
→ In the Select the company popup, select the correct company from the list. If not available, you may cancel and enter data manually.
The company is not found
→ Click on the "Enter Data Manually" button to display the fields for you to fill in.

Legal sector information differs depending on the Legal Sector Type:
- Legal Sector Type – Will define which data you will have to enter in the Legal Sector field (either NACE, or NAF)
- Legal Sector – Either a 4-digit code (NACE) or a 4-digit code followed by an uppercase character (NAF).
Once all the mandatory information is entered, you may click on the "Next" button to proceed to the next step.
'%3e%3cpath%20d='M84%2028L82.6%2026.55L86.15%2023H74V21H86.15L82.6%2017.45L84%2016L90%2022L84%2028Z'%20fill='white'/%3e%3c/g%3e%3cdefs%3e%3cclipPath%20id='clip0_4265_13531'%3e%3crect%20width='24'%20height='24'%20fill='white'%20transform='translate(70%2010)'/%3e%3c/clipPath%3e%3c/defs%3e%3c/svg%3e)
Add verification details and documents
The verification details step focuses on the declarative data necessary for the KYC Review of your compnay.
→ Fill the information as requested by the KYC Form shared with you by Treezor.
→ Upload all the necessary documents for the legal entity as well, still abiding by the KYC Form shared with you by Treezor.


Tip – You can upload the documents later
You may upload documents after the creation process is done. Ensure however that all documents for all users (legal entity and company members) are provided before requesting the KYC Review.
Once all the mandatory information is entered, you may click on the "Next" button to proceed to the next step.
Add the company members
Now, you can directly declare the legal representatives and shareholders of your company.
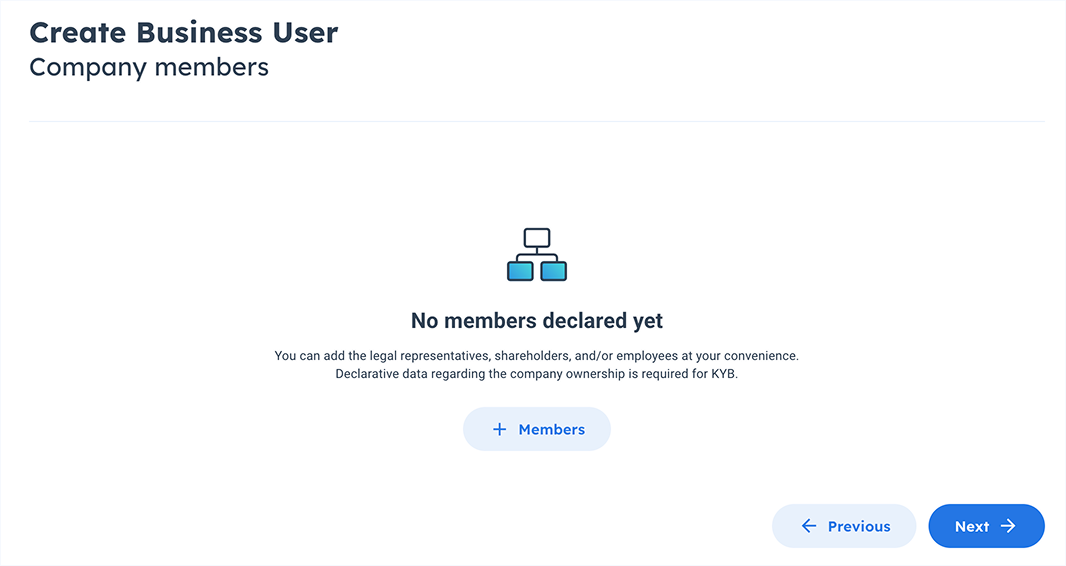
Add the legal representatives
The legal representative is the person legally appointed to represent your company.
As such, you need to create a child user of your company in order to declare this legal representative.
→ Click on the "Add Members" button.

→ Provide the name and unique email of the legal representative in the displayed fields.
→ Select the "Legal representative" role.

→ Navigate the User information, Birth and Nationality, Situation and tax residence, and Documents tabs to fill in all the required information regarding your legal representative.
Add the shareholders
You must declare any shareholder who owns 25% or more of your company (directly or via a holding company).
→ Scroll up to click on the "Add Members" button located in the upper right corner of the view.
Upon doing so, a new section is displayed at the bottom for you to fill with the shareholder information.
→ Provide the name and unique email of the Shareholder in the displayed fields.
→ Select the "Shareholder" role and add the ownership percentage.

→ Navigate the User information, Birth and Nationality, Situation and tax residence, and Documents tabs to fill in all the required information regarding your shareholder.
Repeat the operation for as many shareholders as you need to declare.
Once all the company members are declared, click on the "Next" button located at the bottom of the view.
Confirm the creation
The Summary view displays all the information entered for your company (legal entity) and the company members. Review the information before confirming the creation.

A success message is displayed, and you’re redirected to the User details view, with your company selected.
Review the KYC Documents
Tip – Make sure all the necessary documents are uploaded
If you didn't upload the documents during the user creation steps, you can go to the User details view, KYB tab to upload more documents.
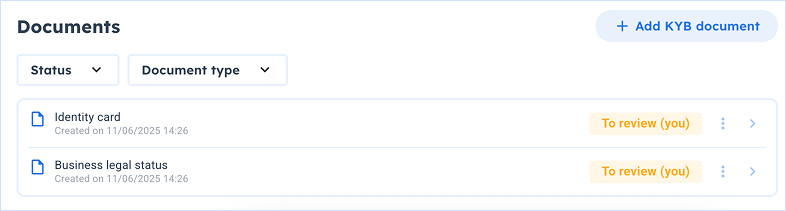
To make sure you’re about to submit the relevant documents to Treezor, a validation step is required.
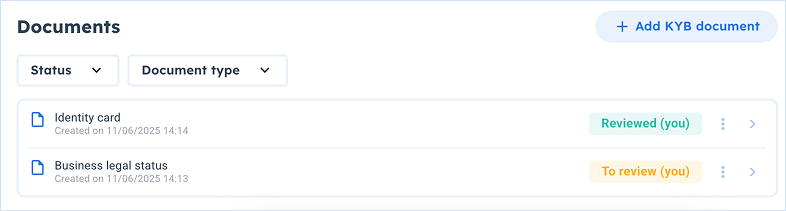
For each one of your users' documents (company, legal representative, and shareholders):
→ In the User details view, KYC (or KYB) tab, Documents section, click on the ellipsis button and select the “Review document” command for each document whose status is “Pending (you)”.
→ In the prompted Review Document popup, review the uploaded document on the left section of the popup.
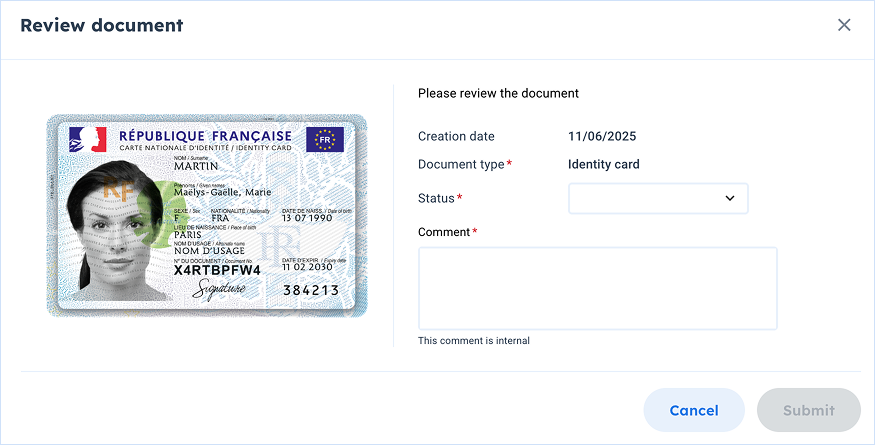
→ If the document is accurate, selected the "Reviewed" option of the Status and enter a comment.
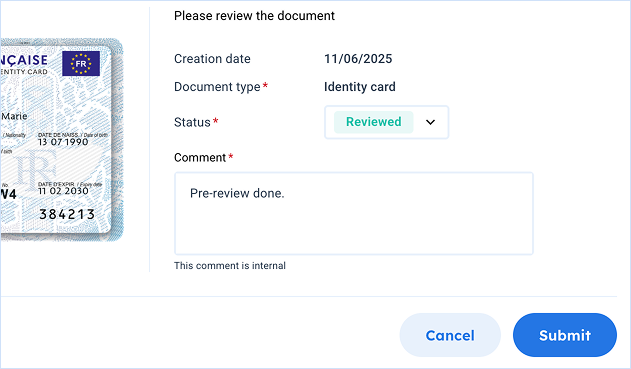
→ Click on the “Submit” button to complete the validation.

As a result, the document status becomes "Reviewed".
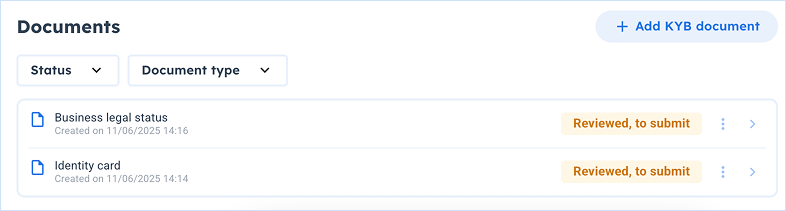
→ Repeat this process for as many documents and users as you need for the KYB process of your legal entity.
Once all the documents are validated, the status changed for "Reviewed, to submit".
Submit your company's KYB to Treezor
Once you have uploaded and validated all the required documents for your company, legal representative and shareholders, you can send this information to Treezor for review.
To do so:
→ In the User details view, make sure the currently selected user is your company’s legal entity.
→ In the KYC tab, click on the “Submit KYC to Treezor” button in the upper right corner of the view.

You don’t need to repeat this operation for the legal representative and the shareholders, it has automatically been done by Treezor.
→ In Sandbox, contact your Implementation Manager to validate your KYB in order to continue testing your implementation.

Information – In Production, verification is done by Treezor Compliance team
Verification usually takes about 24h, but may take up to 48h or more (working days only).
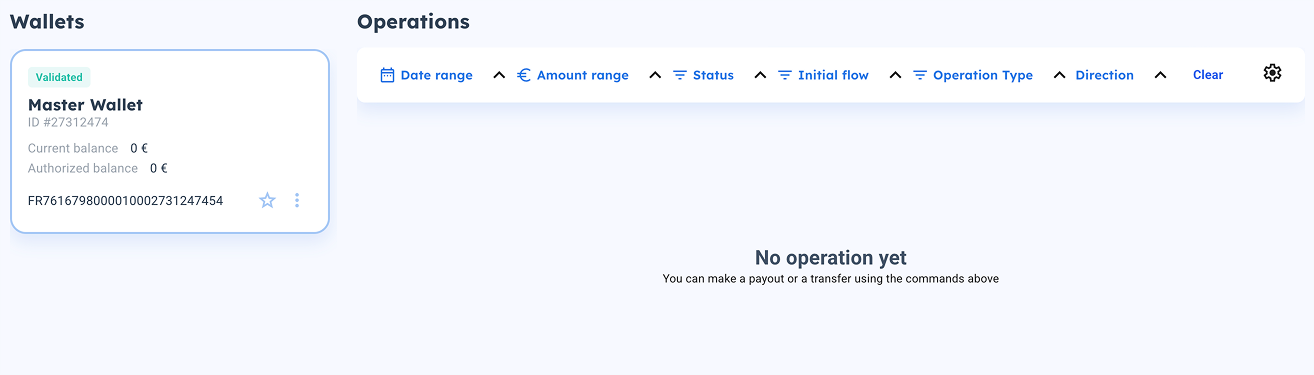
Create your Master Wallet
Your Master Wallet is a wallet of type 15, but only Treezor can create them. You need to create a dummy wallet and then contact your Implementation Manager to turn it into a Master Wallet. To do so:
→ In the User details view, select your legal entity user and click on the Wallets tab.
→ Click on the “Add Wallet” available in the upper right corner.

→ In the prompted Create Wallet popup, enter the following information:
- Wallet name – Name of the wallet
- Wallet type – The Wallet Type 15 is not available by default. You can select any wallet you want and request for an update afterwards.
→ Click on the "Create wallet" button to confirm the creation.
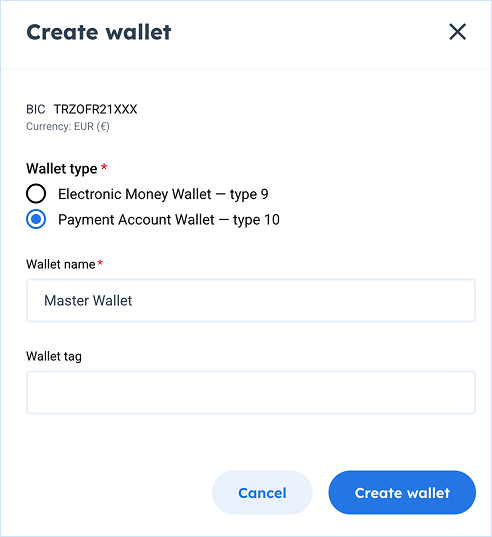
→ Contact your Implementation Manager and provide them with the Wallet ID to change your wallet type to 15.
Abide by additional vigilance measures
Your KYC Form provided by Treezor may indicate that you need to make a credit transfer to complete your company validation process.
This is usually covered in the use cases by the initial transfer made to your Master Wallet.
You can’t make this transfer through the Dashboard. In Sandbox, you will need to go through this step with an API Transfer emulation if you wish to test card transactions.
Check your company’s status
Once Treezor has validated your company, the Global KYC Status section will indicate a “Validated” status.
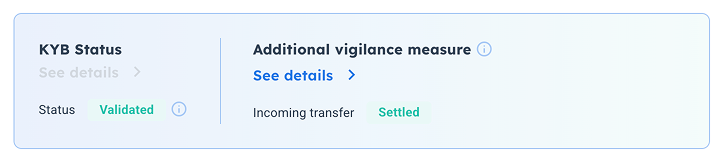
The Master Wallet can only be used once the company is validated.