Appearance
Users
Users refer to your end users, whether they represent legal entities or physical persons. They can be directly created and managed from your Dashboard.
Accessing your users
You may access your user information by:
- Taking advantage of the main Search field.
- Navigating the Users view.
Search field
The Dashboard main toolbar provides a search field, whose searchable attribute becomes dynamically available depending on what you enter.
Here are the attributes for you to search users:
- User ID – The
userIdautomatically generated by Treezor when creating a user. - User Tag – The
userTag, a field you can populate to suit your needs. - Email – The
emailprovided during the user creation. - Name – Takes into account the
firstName,lastName,legalName, andemailprovided during the user creation.
After validating your search for a given user attribute, the Users view is displayed, filtered on the corresponding User for you to select.
Users view
The Users view lists all your users with their key information. Clicking on arrow icon for a user switches the view to the corresponding profile in the User details view.
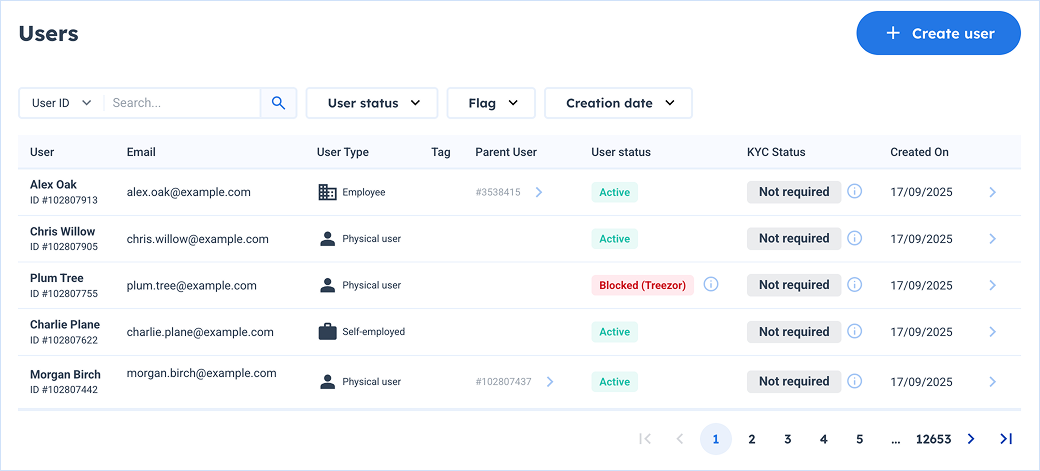
To help you navigate through the list, the following filters are available:
- User status – Display only users with the selected status (Pending, Validated, Canceled).
- Flag – Display only users who are US tax residents.
- Creation date – Display only users created on, before, after, or between specific dates.
In addition, the secondary Search field allows you to search users by the same attributes as the main search.
Navigating the user details
User details view
The User details view is displayed as soon as you have selected a user.
As you keep navigating the Dashboard, there will be as many tabs as there are selected users above the main view, so you can easily come back to the user details.
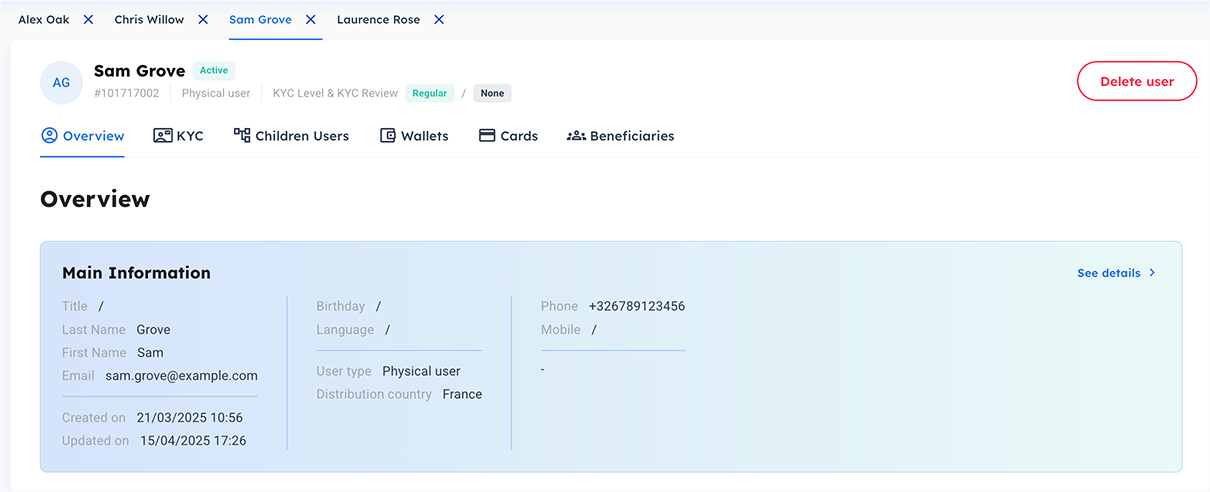
User information
In the User details view, information is broken down into tabs for you to easily manage.
| Tab | Description | |
|---|---|---|
| Overview | All the key information about the user, summarized. If the KYC tab isn't displayed, you can also access the Edit user popup by clicking on the "Edit" button in the upper-right corner. | |
| KYC / KYB | For you to update user information, manage documents, and go through the user KYC/KYB process. | |
| Children Users / Company members | The list of Children Users attached to the currently selected user. When clicking on the "Add Child" button, the Create User view is displayed and set up with the child creation path, with the currently selected user already defined as a parent. | |
| Wallets | All the user Wallets for you to manage. Find out more in the Wallets article. | |
| Cards | All the user Cards for you to manage. Find out more in the Cards article. | |
| Beneficiaries | All the user external accounts, sorted by usage. Find out more in the Beneficiaries article. |
User Overview
The user Overview tab displays information that depends on your activated features and the selected user type. You can see the main information at a glance and then use the links to dive into the details of the user's wallets and cards for instance.
Wallets section
The overview Wallets section displays the first few wallets, but also the overall Balances, that is to say the sum of balances of all the user's wallets.
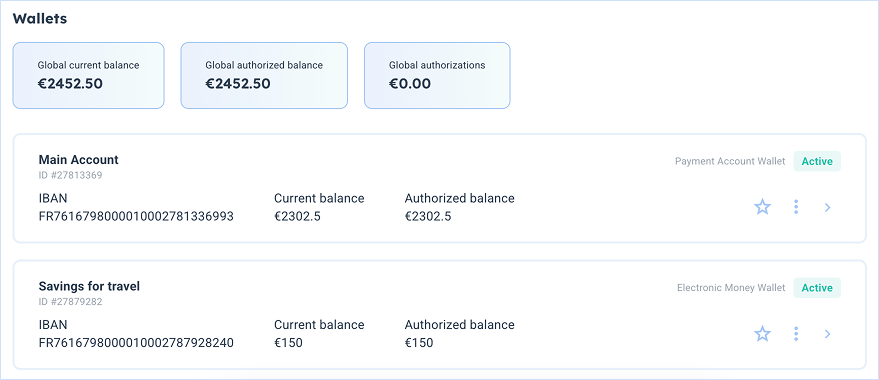
For each displayed wallet, the following commands are available:
| Action | Description | |
|---|---|---|
| Star | Adds wallet as favorite. | |
| Unstar | Remove from favorites. | |
| More | Provide access to the Download document command, which allows you to select a PDF document to download. Learn more in the Wallet commands section. | |
| Details | Switches the view to the Wallets tab, with the corresponding wallet details displayed. |
The "See all wallets" button is displayed in the bottom right corner if there are more wallets than the ones displayed in the overview. It indicates the total number of wallets and switches the view to the Wallets tab when clicking on it.

Cards section
The overview Cards section displays the first few cards, with all their key information.
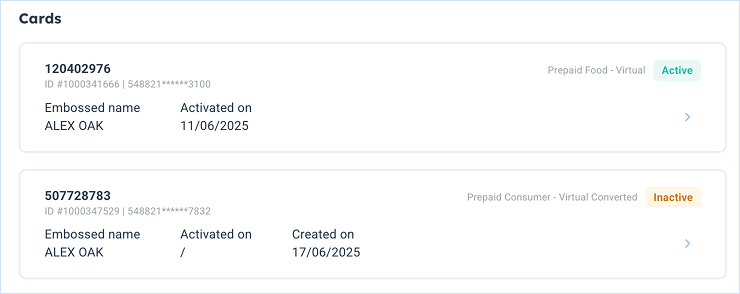
Clicking on the details arrow switches the view to the Cards tab with the selected card details displayed.
The "See all cards" button is displayed in the bottom right corner if there are more cards than the ones displayed in the overview. It indicates the total number of cards and switches the view to the Cards tab when clicking on it.

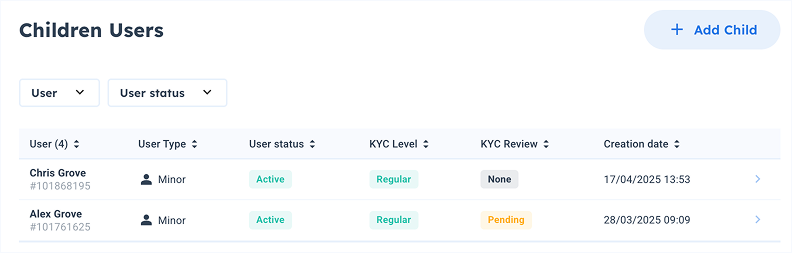
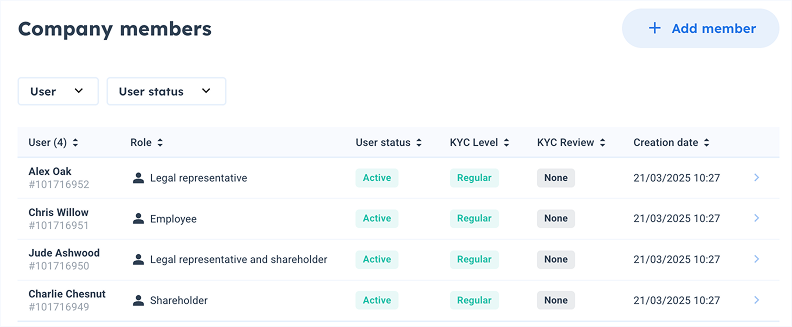
Children users
Hierarchical relations can exist between users, such as:
- Family relations (a parent and actual children, usually minor).
- Ownership relations between a company and its shareholders and representative.
- Company relations with their employees.
Because declarative data changes depending on the use case, the Dashboard offers as much context as possible, with specific tab names ("Children users" for physical users, "Company members" for legal entities), and the relevant user creation path when clicking on the "Add Child" button.
A few use case examples are available in the API Guides.
Creating users
There are multiple buttons across the Dashboard to access the Create User view. This offers a series of creation paths tailored to the context.
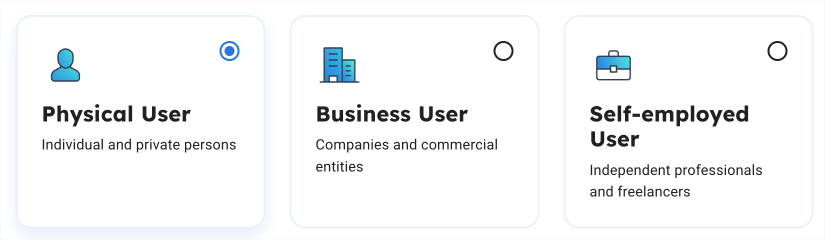
The creation paths are exhaustive so you can fill in all the information at once, including:
- Fill declarative data
- Upload documents
- Declare tax residence
- Create children users (company numbers, employees, parent-children relations, etc.)
Information to fill in may differ depending on the creation path and your own model. Please note that non-required information and documents may be updated after the user creation (but before requesting a KYC Review).
Specific options
Here are a few specific features that may be available depending on your path.
| Options | Physical | Business | Self-Employed |
|---|---|---|---|
| Select parent Enter the parent user ID to create hierarchical relation. | |||
| Prefill data Use legal registration number to prefill data. | |||
| Add company members Create hierarchical relations and declare shareholders and legal representatives. |
Deleting a User
When a User is not in business with you anymore, you may delete them.

Prerequisites – To delete a User
- The Balance of all of their Wallets must be
0 - No card transaction authorization can be pending
To delete a user, you can use the "Delete user" button accessible from their profile. This action is irreversible.

A success message is then displayed in the top of the view and the user status becomes "Deleted".

Note – Users can't be removed
For regulatory reasons, users can't be removed. Once deleted, they will still be displayed in the user list, with a "Deleted" status.
Managing SCA devices
The Dashboard allows you to manage the devices used by the end user for Strong Customer Authentication (SCA).
You may find information about SCA devices in the User details view, Profile tab, if enabled in the Configuration. Each device corresponds to a created SCA Wallet for the selected user on either:
- A mobile device (SDK implementation)
- A web browser (Web Native implementation)
The following information is available regarding the SCA devices: status, creation date, device information (web or mobile), and the tag (custom information).

The following device statuses can be displayed:
- Passcode missing – User has to set their PIN (initially or after reset request).
- Active – User has set their PIN. The device may be used for SCA.
- Locked – The device has been locked.
Available commands depend on the device status and your User Role:
| Command | Description | |
|---|---|---|
| Reset PIN | Allows you to send a request to the end user to reset their SCA PIN code. For mobile devices only. Should only be done if you're sure of the user identity. | |
| Secure SCA | Allows you to lock the device, hence not allowing the user go through strong customer authentication. | |
| Unlock SCA | Allows you to unlock the device. Should only be done if you're sure of the user identity. | |
| Delete SCA | Allows you to delete the device. |
You can use the status filter to access the list of all the devices that used to be enrolled. This may prove useful for customer services and fraud analysis for instance.
Securing SCA on a device
You may lock the device used for Strong Customer Authentication by using the "Secure SCA on this device" command.
When doing so, you are prompted to select a reason for securing the device, and you can add a securing message.
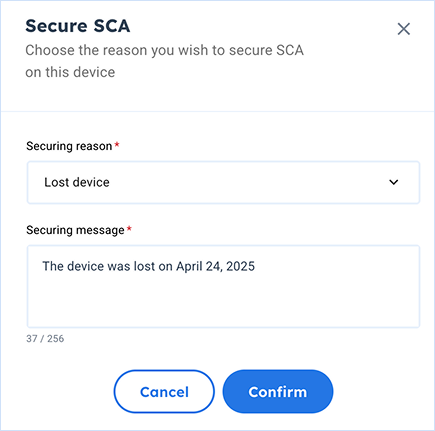
As a result, the device is "Blocked" and the entered information is displayed in the "Lock reason" and "Message" fields.


Security – End user information must be verified prior to unlocking
The "Unlock SCA for this device" and "Reset PIN" commands are available, but should be used with caution. It is your responsibility to make sure the user information is accurate to avoid any kind of fraudulent behavior.